Thursday, October 25, 2007

Types of Rubber Stamps

There are many different kinds of rubber stamps on the market. They are used basically the same way with the same supplies. However, there are a few different supplies needed for the unmounted kind. As you stamp you will find out what kind of rubber stamp you prefer.

Wood Mount
This is the kind of rubber stamp that I started with. It is a rubber image and a cushion adhered to a wooden block. There is an image on the back of the block to show you what your stamped image will look like. Some times these images are in color. This is just to show what the image looks like after you color it. This is just a suggestion, you can color the image anyway you want to.
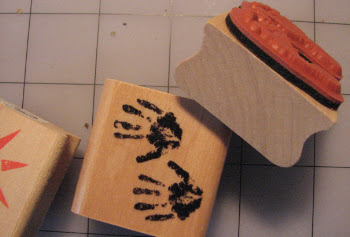
Wood Mounted Rubber Stamps Small wood mount rubber stamps.

Unmounted
When I first started ordering on-line I discovered this kind of stamp. This is just the rubber image, no cushion, no wooden block. These are less expensive and the postage is usually less too. I built up my collection of rubber stamps quickly with these.

To stamp with this kind you will need an acrylic block and either double sticky tape or a repositionable glue. I use Aleene's Tack-It-Over & Over Glue. I spread a thin layer of glue on the back of the rubber image and let it dry. Now it is tacky and ready to stick to the acrylic block. After using the stamp, just peel it off the acrylic block. When using this kind of rubber stamp you can see where your stamped image will be.

At YouTube, there is a video by pinkcatstudio that is a tutorial with unmounted rubber stamps. This is a good video that shows how to use EZ Mount foam mounting sheets from Sunday International. It comes in a sheet that is sticky on one side and has a cushion and static cling plastic on the other side.

As the video explains, you stick the rubber image to the sticky side of the sheet. Use Kai scissors to cut through the set of rubber images and the EZMount foam. These scissors are very sharp. Stamps mounted this way cling to the acrylic block and peel off easily with no mess. Once again, you will be able to see where your stamped image will be.

Acrylic Mount
This kind of stamp is a clear rubber image mounted on a clear acrylic block. There is an image on the other side of the block that shows what your stamped image will look like. With this kind of stamp you can see exactly where your stamped image will be.

Acrylic Block and Cling Stamps
These are also clear unmounted rubber stamps. This kind will adhere to the acrylic block themselves. These are becoming popular in my area. Hobby Lobby has a nice selection of these. I have even found some of these at my HEB grocery store. To use this kind, stick it to the acrylic block, ink, and stamp. These are great rubber stamps. One set of acrylic blocks is all you need. After you stamp your image, just peel it off the block and stick it back on the plastic storage sheet it comes with. These rubber stamps take up very little storage space because they all use the same set of acrylic blocks. Once again, you will be able to see exactly where your stamped image will be.


Cling stamps on acrylic block and on storage sheet.


Foam Mounted Stamps
Another kind of stamp I enjoy using are the foam stamps. These have bold images that I love to emboss and cut out. They are inexpensive and lots of fun. The larger stamp of this kind is used to stamp on walls and furniture using acrylic paint. Sometimes the foam stamps are on a cube with four images. These usually sell for less that a dollar. Wal-Mart has these during the holidays. I have found sets of foam stamps at Target also.

With all of the different rubber stamps the ideas are limitless. I don't have a favorite kind -- I love them all.

Monday, October 15, 2007

TUTORIAL: Heat Embossing with Rubber Stamps

Embossing really makes your cards and projects special. Heat embossing creates a raised pattern from your rubber stamp image. It's very easy to do if you have the proper supplies.

Heat Embossing Supplies
You will need:

  • rubber stamps of your choice
  • pigment ink pad
  • embossing powder
  • embossing heat gun
The embossing heat gun I use is one made by Marvy Uchida, I've had it for about twelve years and it still works great. An embossing heat gun gets hotter than a hair dryer so you need to use caution when you use it. You also need cardstock and alcohol free baby wipes to clean your stamps with. I stamp on a piece of paper so I can funnel the embossing powder back into the jar.

Heat Embossing Steps
After gathering your supplies:

  1. Place your cardstock on the piece of paper.
  2. Ink your rubber stamp with the pigment ink.
  3. Stamp your image.
  4. Pour embossing owder over the stamped image.
  5. Dump the excess powder off the cardstock onto the paper and funnel this back into the jar.
  6. Turn the heat gun on and move it back and forth over the stamped image.

Using the Heat Gun
Hold the heat gun about six inches above your project. As the embossing powder melts it will rise up a bit and become shiny . Be careful not to heat it too long because the powder will melt too much and flatten out and look dull. This powder melts very fast so it doesn't take much. Once done, turn off the heat gun and place it on a heatproof surface.

Heat Embossing Tips
Here's a few things I do to make my projects look good. I try and use the same color pigment ink pad and embossing powder, I get better coverage that way. You can use what is called an embossing ink pad for any of your embossing powders. These are usually tinted pink or blue. I have one that is clear because sometimes I want to use clear powder and the tinted ink will show through.

Another way to do heat embossing is with embossing markers. I have some by Marvy Uchida called Wet Looks. These are fun because you can color the rubber side of your stamp different colors, stamp the image and use clear embossing powder and heat.It's very simple and looks so pretty.

EK Success makes Zig markers with embossing ink in different tips, such as bullet, detail, and calligraphy. I use these to write in my cards and emboss the words. I also use these to make borders, just run the marker along a plain or fancy ruler and emboss.What an easy way to fancy up your card.

Embossing is one of my favorite ways to use foam stamps. I get a nice bold image that I cut out and use on my cards or scrapbook pages. When I teach children to make cards, I pre-make several of these images so all the children have to do is adhere them to their projects. This way I don't have to worry about the hot heat gun burning someone.

Embossing Powders
There are several different kinds of embossing powders. They are all used the same way, but with different results. There are Fine Line Detail powders for detailed stamps. I also use these with my word or phrase stamps. There are powders that sparkle with glitter, powders that are scented, some that glow in the dark. Ranger has a line of Distress powders the give a distressed look to your projects. There are inks in this line also.

It is also fun to mix up your own embossing powders. I found this out when I tried to mix red and white powder to get pink. I didn't get pink -- I got white with tiny red flecks in it. I had to buy pink. Embossing powders don't mix like paint. It's fun to mix them and you can add extra fine glitter to get added sparkle.

I have found embossing powder recipes on the internet and mixed up a few of my own. Two of my favorite mixes are one I call Candy Corn, which is two parts white, one part orange, and one part yellow. My other favorite is one I call Christmas Time which is two parts white, one part red, one part green, one part gold, and one part extra fine glitter in gold. By a "part", I mean one forth of a teaspoon. I don't make much at a time. A little embossing powder goes a long way.

I hope you explore the use of embossing powders. They are so much fun and add a little dazzle to your projects.

Saturday, October 6, 2007

Potholder Stamps

Here's a rubber stamping idea submitted by a reader. Ann writes:

Just like you talked about in your article on finding stamping supplies in all kinds of places, I found these nifty stamps in the housewares department at Wal-Mart just this week.

I spotted a display of fall colored potholders made out of some kind of rubber with raised leaf patterns. I grabbed two of them thinking they would make better stamps than potholders.


Here's a picture of the gold one just like it comes from the store.

I cut one potholder up and made four different stamps from it. You can see in the picture that I mounted two of them on some scraps of wood I had here at home.


I haven't used the stamps in a project yet, but here's a picture of some scrap card stock and watercolor paper I stamped with different inks for practice.

Ann


Wow, Ann, how creative of you! I can't wait to go to Wal-Mart and grab some of these for myself! Now even the housewares department is looking like fun. I can't wait to see a finished project. Please share pictures with us.

Tuesday, October 2, 2007

TUTORIAL: Your First Stamping Project

Step-by-Step Tutorial - Stamped Card

This tutorial describes how to make a very basic, first stamped greeting card.


Simple Stamped and Colored Card
Assemble Materials.
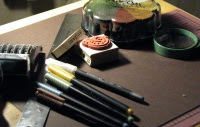
The first step is to set out your supplies that you are going to use. For your first stamping project keep materials simple:
  • blank card (or cardstock plus craft knife and ruler)
  • a picture stamp
  • a word or phrase stamp
  • at least one ink pad
  • colored pencils or markers

Rubber Stamping SuppliesAlso handy to have: cutting mat, magnifying glass (for detail work, if any) , baby wipes or cleaning cloths for your stamps and work area.

Rubber Stamps
The specific materials used in the illustrated card:
  • Paper Bouquet Reversible Linen Textured Card Stock (Brown/Tan)
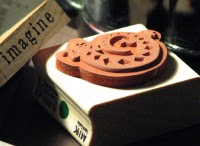
  • Rubber Stampede "Spiral Gecko" Stamp
  • Inkadinkado Creative Words - "Imagine" Stamp
  • Color Box Petal Point Ink Pads - Alchemy
  • Prang Brush Pens

Cutting Card StockMake a Card.
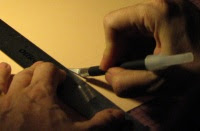
You can buy blank card and envelope sets at your local craft store. Or, for an even greater variety of paper and size options, make your own card from a sheet of cardstock. Decide how big you want your card to be and cut the cardstock to size. If making a large card, make sure you have an envelope that is large enough. You could also make your own envelope.

Ink a StampInk a Stamp.
Select a stamp for the front of your card. Ink it by tapping it on your ink pad. If it is a large stamp (or you have small ink pads), turn it face up and tap your ink pad all over it.

Stamp the CardStamp an Image.
Stamp your image by pressing all over it firmly and lift straight up. To get a clear image using large stamps it is easier if you have an old foam mousepad under your cardstock. You may want to practice stamping on scrap paper to get the feel of stamping before you stamp on your project paper.

Lift Up Stamp
Clean Your Stamp.
After stamping I clean my stamp off with baby wipes. These are economical and easy to use. If that doesn't get your stamps clean enough,a little water and a toothbrush will do the trick.
There are many ways to clean a rubber stamp. In Ways to Clean Rubber Stamps Judith Perry lists dozens of solutions from many different crafters.


Color the StampColor Stamped Image.
Coloring is optional but it can really enhance the appearance of your stamps. There are various ways to color your stamped image. One of my favorites is Prisma color pencils. I can get nice solid coverage. I use markers sometimes, but it's hard not to get streaks. For a softer look you can use chalks or watercolor pencils.

In this illustration, colored markers are used to fill in parts of the design. A magnifying glass helps to minimize mistakes when filling in small areas such as in this stamp design. You can see the linen texture of the paper in this magnified image.

Inside SentimentStamp Inside Card.
After the front of your card is complete stamp the word or phrase inside of your card. You may want to write a personal note instead.

Sign Your WorkSign Your Work.
For a finishing touch, sign your work. There are several different kinds of stamps that say "hand stamped by". You can stamp this on the back of your card if you wish, filling in your name or using a stamp of your name or a personal logo.

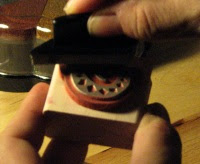
In this illustration, a Provo Craft alphabet stamper spells out "I Made It" in 18 point type. This kind of stamp has rotating wheels with the alphabet so you can spell out custom messages.

Now you have a complete handmade card, made especially for the one receiving it. What a thoughtful way to show someone you care.

NOTE: The illustrations accompanying this article show an actual crafter, inexperienced in rubber stamping, following these instructions to make a card. Tell me about your first rubber stamping project.