This tutorial describes how to make a very basic, first stamped greeting card.

Assemble Materials.
The first step is to set out your supplies that you are going to use. For your first stamping project keep materials simple:
- blank card (or cardstock plus craft knife and ruler)
- a picture stamp
- a word or phrase stamp
- at least one ink pad
- colored pencils or markers
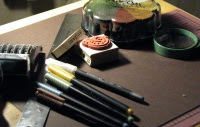 Also handy to have: cutting mat, magnifying glass (for detail work, if any) , baby wipes or cleaning cloths for your stamps and work area.
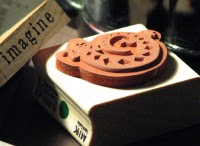
The specific materials used in the illustrated card:
- Paper Bouquet Reversible Linen Textured Card Stock (Brown/Tan)
- Rubber Stampede "Spiral Gecko" Stamp
- Inkadinkado Creative Words - "Imagine" Stamp
- Color Box Petal Point Ink Pads - Alchemy
- Prang Brush Pens
 Make a Card.
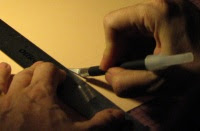
You can buy blank card and envelope sets at your local craft store. Or, for an even greater variety of paper and size options, make your own card from a sheet of cardstock. Decide how big you want your card to be and cut the cardstock to size. If making a large card, make sure you have an envelope that is large enough. You could also make your own envelope.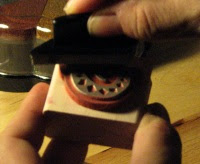 Ink a Stamp.
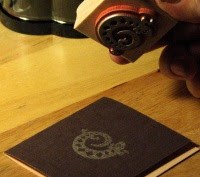
Select a stamp for the front of your card. Ink it by tapping it on your ink pad. If it is a large stamp (or you have small ink pads), turn it face up and tap your ink pad all over it.
There are many ways to clean a rubber stamp. In Ways to Clean Rubber Stamps Judith Perry lists dozens of solutions from many different crafters.

In this illustration, colored markers are used to fill in parts of the design. A magnifying glass helps to minimize mistakes when filling in small areas such as in this stamp design. You can see the linen texture of the paper in this magnified image.
 Stamp Inside Card.
 Sign Your Work.
In this illustration, a Provo Craft alphabet stamper spells out "I Made It" in 18 point type. This kind of stamp has rotating wheels with the alphabet so you can spell out custom messages.
Now you have a complete handmade card, made especially for the one receiving it. What a thoughtful way to show someone you care.
NOTE: The illustrations accompanying this article show an actual crafter, inexperienced in rubber stamping, following these instructions to make a card. Tell me about your first rubber stamping project.



5 comments:
Great tutorial, I espically like the reminder to sign your work!
Thanks for your comment. I feel we should be proud of our work.
You forgot to mention some other materials all stampers might need. Such as Soda or coffee/tea. Candy to nibble on *laughs*
Nibbles are great, just be sure you don't get oily or sticky fingers! Lots of us nibble while we work. Drinks are okay too, just be very careful not to spill. Now son, will you come stamp with me?
Well written article.
Post a Comment